Track Saw: Difference between revisions
No edit summary |
|||
| Line 5: | Line 5: | ||
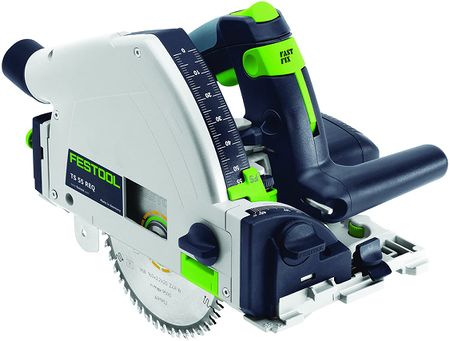
The track saw is a staple of any woodshop. The saw allows you to make straight cuts into large materials, in order to cut them to size. This particular saw comes with tracks, which can be placed over the material to allow for accurate, straight cuts. This tool is especially helpful in cutting down 4x8' sheets of plywood into smaller, workable sizes. This tool is used in conjunction with the dust collector, which activates automatically as soon as the saw is powered on, minimizing the expulsion of sawdust when in use. | The track saw is a staple of any woodshop. The saw allows you to make straight cuts into large materials, in order to cut them to size. This particular saw comes with tracks, which can be placed over the material to allow for accurate, straight cuts. This tool is especially helpful in cutting down 4x8' sheets of plywood into smaller, workable sizes. This tool is used in conjunction with the dust collector, which activates automatically as soon as the saw is powered on, minimizing the expulsion of sawdust when in use. | ||
==Training== | ==Training== | ||
Training is required to use this tool | Training is required to use this tool. | ||
==Trained Managers== | ==Trained Managers== | ||
Latest revision as of 20:43, 7 May 2021
Description
The track saw is a staple of any woodshop. The saw allows you to make straight cuts into large materials, in order to cut them to size. This particular saw comes with tracks, which can be placed over the material to allow for accurate, straight cuts. This tool is especially helpful in cutting down 4x8' sheets of plywood into smaller, workable sizes. This tool is used in conjunction with the dust collector, which activates automatically as soon as the saw is powered on, minimizing the expulsion of sawdust when in use.
Training
Training is required to use this tool.
Trained Managers
The managers that have adopted this tool and can help you with using. Keep in mind these are not the only managers that know how to use this tool, feel free to ask any. Full list of adopted tools can be found here here. Could not get URL https://docs.google.com/spreadsheets/u/2/d/1OWqoa5hGArO427buM7213HOFsia-I8W9aUs01hW2Gpo/gviz/tq?tqx=out:csv&gid=0&tq=select%20F%20where%20G%20%3D%20%22Track%20Saw%22 after 3 tries.
| Manager |
|---|
Tips & Tricks
- Mark lines clearly on the material, making sure which is the 'good' side and which is the 'waste' side.
- Always check for the correct material thickness being set on the tool. Not doing this can lead to partial cuts or the blade getting caught in the table below, leading to possible damage to the equipment.
- Place the track according to the cut line on the material and make sure to clamp it in place with the provides clamps.
- Only plunge the blade into the material when the motor has sped up enough. Not doing so can lead to the blade getting caught, possibly jerking and leading to injuries/damage to the equipment.
Manuals
A pdf copy of the manual can be viewed on the sandbox shared drive here.
Consumables
- Blades - the primary consumable for this tool are blades. The blades are usually changed by the mangers/faculty when they are worn out so no student is required to change the blade themselves. In case you need to cut a material different than wood, please contact a manager for assistance.
