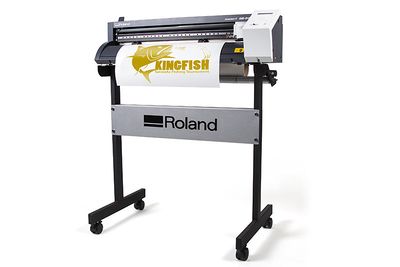
Operating Roland GS24
Description
This page will help you with all the technical aspects of using the Roland GS24 vinyl cutter. Specifically we will be going over the print and cut process of printing a slightly modified image that the cutter can process and cut on certain lines.
Setting the Origin
The origin is the spot from where the cutting position starts. You want to put this as close as possible to the edge or other cuts so you don't waste any material.
You can move this by using the arrow keys to move the knife to the new location. You want to move the top of the cut inline with the blade protector (black plastic with hole in the middle under the blade). Holding down the ORIGIN button for at least one second will reset the origin with the ORIGIN SET message being flashed in the display.
Loading/Removing Material into the Cutter
To load material into the Roland:
- Lower the Loading Lever (Without excessive force) to release pressure
- Insert the material through the front of the machine (with short edge going forward, long edges on the side)
- Ensure the edges of the paper are inside the grit marks (white markings above the material)
- Move the pinch rollers (wheels below the grit marks that move the material up and down) to the edge of the materials - with each still inside the grit marks.
- Check that your material is straight by comparing it to the guide lines (straight lines on the base of the printer)
- With everything in place, raise the loading lever to lock the material in place
To remove the material from the Roland:
- Press Menu until you see UNSETUP show up on the screen
- Press ENTER to return the cutting carriage to the home position
- Lower the loading lever to release the pressure on the material
Now you have two ways of removing the material, all or just the cut part
- Remove all the material by pulling it towards you
- If you would like to continue cutting on the same piece of material or just to remove the whole cut area, you can use a knife to cut along the knife guide (the line farther down horizontal across the guide lines). Before cutting you should pull your cut area just below the knife guide to ensure no wasted material.
Printing and Cutting
This process is very important as it allows you to print anything you want with custom lines to designate where the Roland should cut. You must ensure that the printed image is clear or else the cutter will not be able to read the lines correctly, resulting in a failed make.
Preparing Print with Cut Studio
CutStudio is Roland's software to provide you with custom graphics to print on their vinyl cutter.
Preparing Print with Illustrator
Testing the Cutter
A general rule is whenever you are putting a new material into the cutter to use for the first time in one instance, you should test the current settings to ensure the highest quality print.
After loading your material and setting your settings:
- Ensure the PEN FORCE slider setting is set to "0" (center)
- Hold down the TEST key to print out the pattern (Where the blade is at that time is the start of the cut)
Now the test pattern is printed, this part will tell you if there are any problems will your settings.
- Firstly, peel off the inside of the outer circle (between the circle and square)
- If it doesn't peel off cleanly, you will need to change the blade force
- Then peel off the inner square.
- There should be a thin cutting line left behind, if not you will need to change the blade force

