Network/VPN/Linux: Difference between revisions
Jump to navigation
Jump to search
(→Connecting through the Pulse Secure client: Pulse Secure 22.3.R1 64 bit) |
|||
| (13 intermediate revisions by 3 users not shown) | |||
| Line 1: | Line 1: | ||
The UMIACS VPN is accessible through the Pulse Secure Client. | |||
==Prerequisites== | |||
* A [[Accounts#UMIACS_Account | full UMIACS account]] | |||
* Device enrolled with [[Duo | UMIACS Duo]] for multi-factor authentication | |||
* An established network connection (wired or wireless) | |||
== Connecting through the Pulse Secure client == | == Connecting through the Pulse Secure client == | ||
#'''Download the client:''' | #'''Download the client:''' | ||
#:[[Media:Pulsesecure_22. | #:[[Media:Pulsesecure_22.7.R4_amd64.deb|64 bit Pulse Secure Client <tt>.deb</tt> for Debian-based Linux (e.g. Ubuntu)]] | ||
#:[[Media: | #:[[Media:Pulsesecure-22.7-R4.x86_64.rpm|64 bit Pulse Secure Client <tt>.rpm</tt> for Fedora-based Linux (e.g. Red Hat)]] | ||
#:''Upon starting the client for the first time it may ask to upgrade the client. This will pull an up-to-date version of the client with the most recent configuration.'' | |||
#'''Navigate to the download location in terminal. e.g.: ''' <tt>cd ~/Downloads</tt> | #'''Navigate to the download location in terminal. e.g.: ''' <tt>cd ~/Downloads</tt> | ||
#'''Install the package with dependencies, providing your password for sudo when requested.''' | #'''Install the package with dependencies, providing your password for sudo when requested.''' | ||
#:<code>sudo dpkg -i <insert_filename_here>.deb</code> | #:*For a Debian-based OS, run: <code>sudo dpkg -i <insert_filename_here>.deb</code> | ||
#:[[Image:UbuntuPulseInstall.png|thumb|center|500px|]] | #:[[Image:UbuntuPulseInstall.png|thumb|center|500px|]] | ||
# You will need to manually install the packages | #:*For a Fedora-based OS, run: <code>sudo rpm -i <insert_filename_here>.rpm</code> | ||
#:[[Image:FedoraPulseInstall.png|thumb|center|500px|]] | |||
# You will need to manually install the packages shown below before proceeding with the install: | |||
#:*For a Debian-based OS, run: <code>sudo apt-get install libnss3-tools net-tools</code> | |||
#:*For a Fedora-based OS, run: <code>sudo dnf install libbsd webkit2gtk3</code> | |||
#'''Start the client.''' | #'''Start the client.''' | ||
#:[[Image:UbuntuPulseDesktop.png|thumb|center|500px|]] | #:[[Image:UbuntuPulseDesktop.png|thumb|center|500px|]] | ||
#'''and click 'Add' (+) under the connection section.''' | #'''and click 'Add' (+) under the connection section.''' | ||
#:[[Image:UbuntuPulseInterface3.png|thumb|center|500px|Click the 'Add' (+) button to create a new connection.]] | #:[[Image:UbuntuPulseInterface3.png|thumb|center|500px|Click the 'Add' (+) button to create a new connection.]] | ||
#'''Enter a name for your VPN connection and the server URL 'vpn.umiacs.umd.edu'''' | #'''Enter a name for your VPN connection and the server URL 'vpn.umiacs.umd.edu'.''' | ||
#:[[Image:UbuntuPulseInterface1.png|thumb|center|500px|Enter the name of the VPN server.]] | #:[[Image:UbuntuPulseInterface1.png|thumb|center|500px|Enter the name of the VPN server.]] | ||
#'''Enter your UMIACS credentials and hit connect.''' | #'''Enter your UMIACS credentials and hit connect.''' | ||
| Line 41: | Line 48: | ||
==Checking VPN Status== | ==Checking VPN Status== | ||
# Launch the Pulse Client GUI | # Launch the Pulse Client GUI. | ||
#:[[Image:UbuntuPulseDesktop.png|thumb|center|280px|]] | #:[[Image:UbuntuPulseDesktop.png|thumb|center|280px|]] | ||
# Select the down arrow to show connection status. | # Select the down arrow to show connection status. | ||
#:[[Image:UbuntuPulseInterface4.png|thumb|center|280px|]] | #:[[Image:UbuntuPulseInterface4.png|thumb|center|280px|]] | ||
Latest revision as of 01:46, 12 December 2024
The UMIACS VPN is accessible through the Pulse Secure Client.
Prerequisites
- A full UMIACS account
- Device enrolled with UMIACS Duo for multi-factor authentication
- An established network connection (wired or wireless)
Connecting through the Pulse Secure client
- Download the client:
- 64 bit Pulse Secure Client .deb for Debian-based Linux (e.g. Ubuntu)
- 64 bit Pulse Secure Client .rpm for Fedora-based Linux (e.g. Red Hat)
- Upon starting the client for the first time it may ask to upgrade the client. This will pull an up-to-date version of the client with the most recent configuration.
- Navigate to the download location in terminal. e.g.: cd ~/Downloads
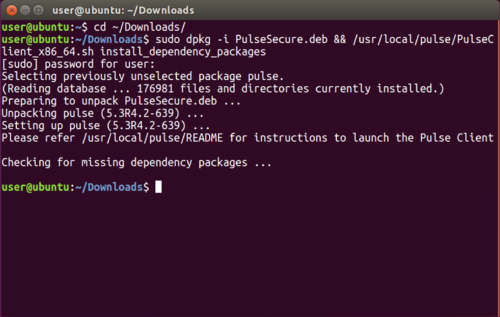
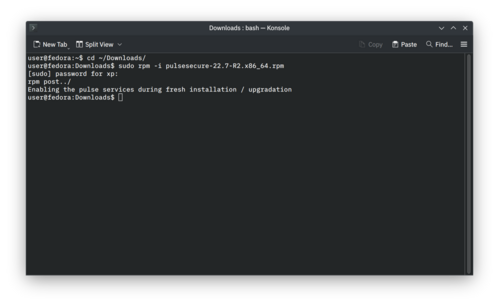
- Install the package with dependencies, providing your password for sudo when requested.
- For a Debian-based OS, run:
sudo dpkg -i <insert_filename_here>.deb
- For a Debian-based OS, run:
-
- For a Fedora-based OS, run:
sudo rpm -i <insert_filename_here>.rpm
- For a Fedora-based OS, run:
- You will need to manually install the packages shown below before proceeding with the install:
- For a Debian-based OS, run:
sudo apt-get install libnss3-tools net-tools - For a Fedora-based OS, run:
sudo dnf install libbsd webkit2gtk3
- For a Debian-based OS, run:
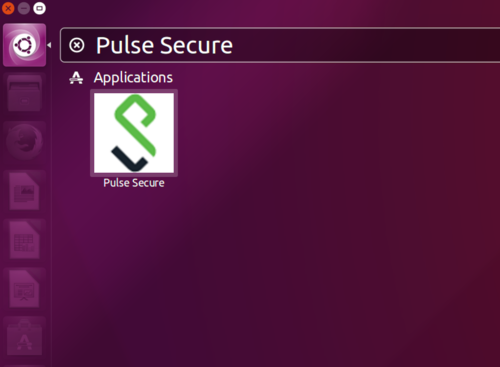
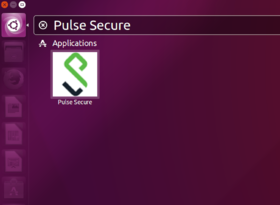
- Start the client.
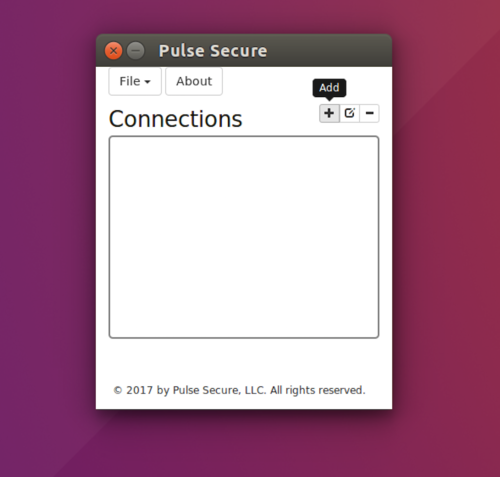
- and click 'Add' (+) under the connection section.
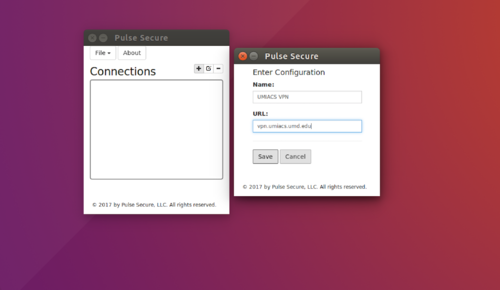
- Enter a name for your VPN connection and the server URL 'vpn.umiacs.umd.edu'.
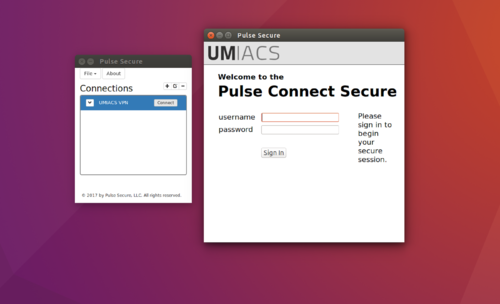
- Enter your UMIACS credentials and hit connect.
- When prompted for a secondary password, enter one of three options below (push, phone, or <press YubiKey>). For example, if you wish to push a notification to your device, type the word "push" into the secondary password box.
Second Credential Password Value: Result push Send a push verification to your Duo connected device phone Send a call verification to your Duo connected device. <press YubiKey> If you have a physical token then you would press the YubiKey for the one time password.
- Please note that registering a YubiKey for use with the VPN requires interaction with UMIACS Tech Staff. Please contact us if you would like to register a YubiKey for this purpose.
| Pro-tip: Select ‘Save Settings’ on the secondary authentication prompt to have Duo automatically use your preferred method. |
You should now be connected to the UMIACS VPN. You can close the window and the VPN will remain connected.
Checking VPN Status
- Launch the Pulse Client GUI.
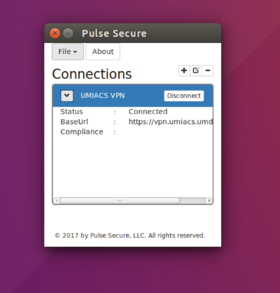
- Select the down arrow to show connection status.
