Remote Desktop: Difference between revisions
No edit summary |
No edit summary |
||
| Line 51: | Line 51: | ||
==UNIX== | ==UNIX== | ||
===xfreerdp=== | ===xfreerdp=== | ||
If you are trying to access a Windows host via RDP, you should use the xfreerdp client from the command line. This should be preinstalled, so there is no configuration that needs to happen. | |||
To connect via RDP to a remote host with xfreerdp, type the following command, replacing values as appropriate: | |||
<pre> xfreerdp -d UMIACS -u <USERNAME> --plugin cliprdr -g <GEOMETRY> <HOSTNAME></pre> | <pre>xfreerdp -d UMIACS -u <USERNAME> --plugin cliprdr -g <GEOMETRY> <HOSTNAME></pre> | ||
Similar to rdesktop, here is an explanation of the values above: | Similar to rdesktop, here is an explanation of the values above: | ||
Revision as of 14:01, 23 October 2024
Introduction
Remote Desktop allows you to connect to another computer from a network that is compatible. Currently, at UMIACS, this feature is only supported for Windows hosts using the Remote Desktop Protocol (RDP). If you need to remotely connect to a UNIX host, please see SecureShell. With RDP, you can control your Windows desktop environment through a graphical user interface. Mouse and keyboard movements are transferred over a network to a Windows host running an RDP server, which sends screen refreshes back.
To access an RDP enabled machine, you must be on the UMIACS physical network or VPN. You must also be authorized to access and remotely control the host you are requesting. If a remote session is active, it is not possible for another user to log onto the console in-person. Attempting to use RDP when a computer is in use by another user could force the existing user to logoff and lose their work. You should always quit RDP by logging off of the remote computer. Simply quitting the RDP client can cause you to stay logged in and prevent other users from accessing the remote host, even at the physical console.
How to Connect
- Prerequisites:
- Connected to the UMIACS VPN or be within the UMIACS network border.
- Be a member of the 'Remote Desktop Users' group on the remote machine. Please contact staff if you do not have remote access to a machine you feel you should.
Windows
For connecting to Windows client over RDP, we recommend the native Windows 'Remote Desktop Connection' client.
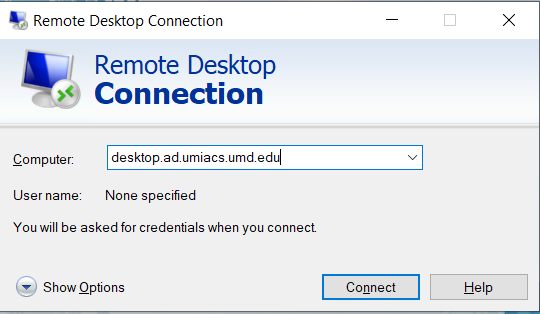
- To start the RDC client, click the "Start'" or "Windows" button on the taskbar. In the menu, navigate to "All Programs," "Accessories," then select "Remote Desktop Connection". Alternatively, you can search for "Remote Desktop Connection" in the Start menu's search field.
- Once RDC client starts, type the name of the RDP/Windows host you are trying to access. The name should be the Fully Qualified Domain Name (FDQN), e.g. desktop.ad.umiacs.umd.edu where
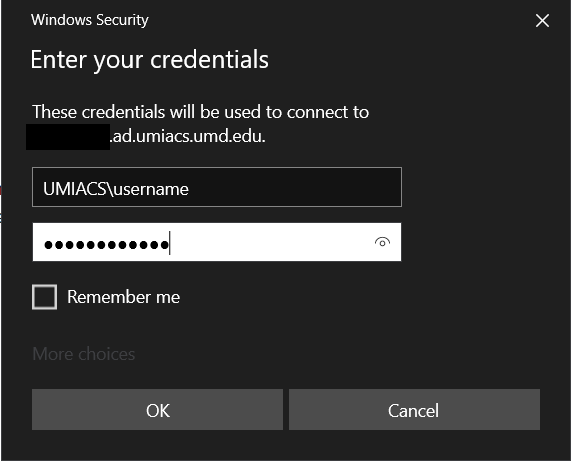
desktopis replaced by the name of the desktop you are trying to connect to. At this point, click "Connect" to initiate the RDP session. - Upon reaching the Windows Security prompt, enter your UMIACS credentials. Please note that the username must be in the format UMIACS\username, where
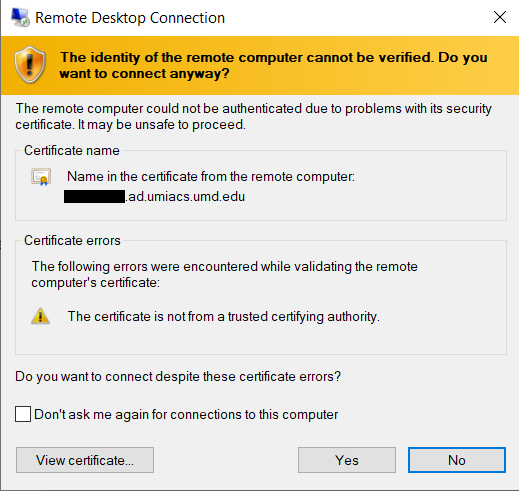
usernameis replaced by your UMIACS username. The slash must also be a back slash and not a forward slash. If the username is either not correct or not the desired account, click on "More choices" and select "Use another account". Click "Ok" when you are done. - After the connection is started, a warning message may alert you to an identity verification failure. For UMIACS machines, you can ignore this and proceed by checking the box and selecting "Yes".
- You should now be viewing the remote computer. To terminate the session, you should logout of Windows.
To switch between your current host and the remote host, click the minimize or "-" button on the top connection bar. With RDC, the clipboard can be transferred between the remote and current host while the RDC client is running and logged in.
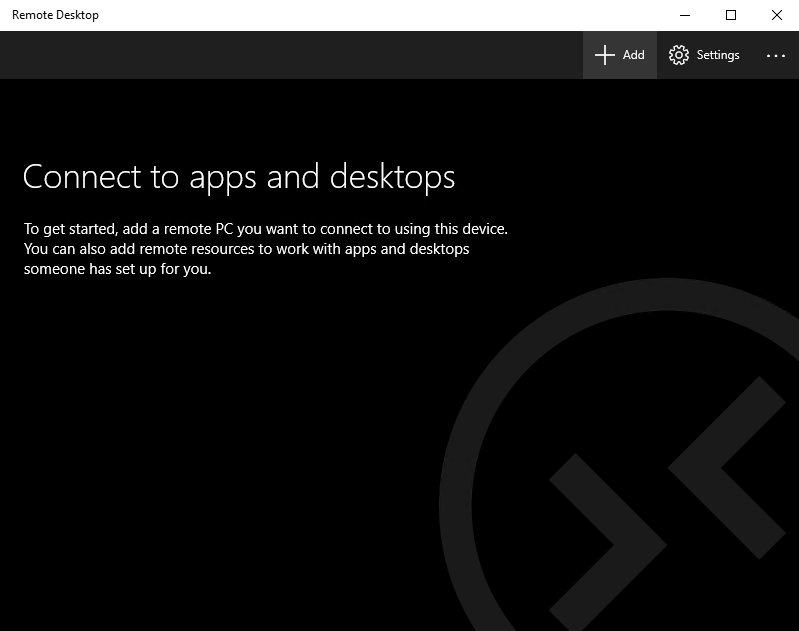
Alternatively, you can use the Microsoft Remote Desktop application from the Windows Store, which is available for download here.
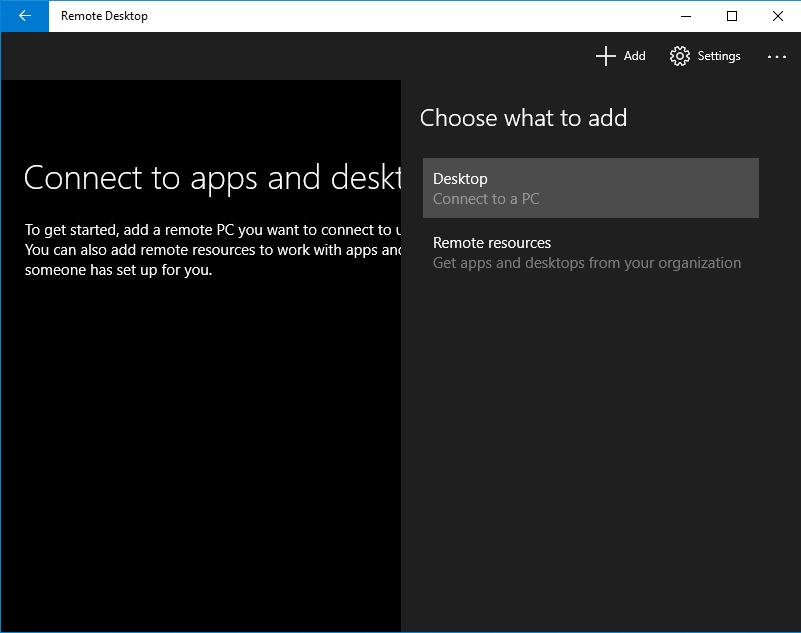
- Open Microsoft Remote Desktop.
- Click "Add" in the top right corner.
- Next, click "Desktop - Connect to a PC".
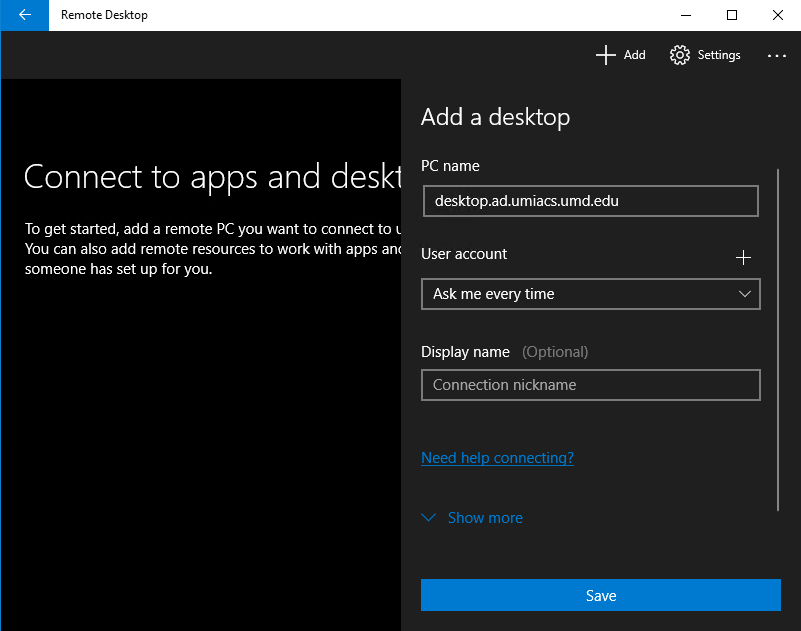
- Type the name of the RDP/Windows host you are trying to access in PC Name. The name should be the Fully Qualified Domain Name (FDQN), e.g. "desktop.ad.umiacs.umd.edu". Once you have filled that out, click Save.
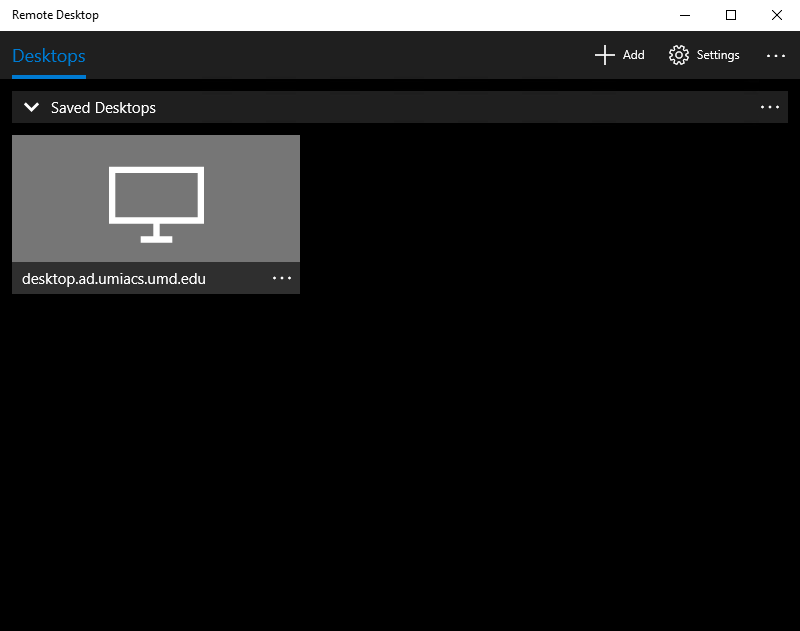
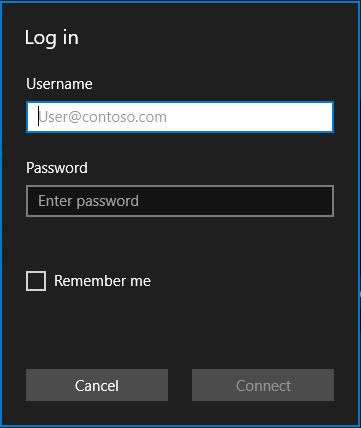
- Now, you should be on a page where you will see the PC you have just added. Double-click the PC and enter your UMIACS credentials. Please note that the username must be in the format UMIACS\username (this must be a back slash and not a forward slash). Then, click Connect.
- If it asks to "Accept certificate and connect?", press Connect.
macOS
For connecting to Windows client over RDP, we recommend the 'Microsoft Remote Desktop' application. Another, although less preferred, options is the CoRD client.
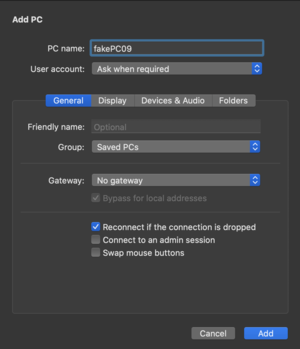
- Open the 'Microsoft Remote Desktop Application' and select '+ New' to create a new device profile
- Fill in the'PC Name' field with the name of the remote host you wish to connect to. If you wish to redirect resources from the remote machine to your local machine, please see the section titled 'Redirecting Resources on Mac' below. Then press the blue add button in the bottom right corner.
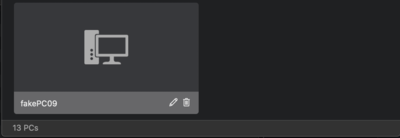
- You will now see the device listed below. Double click it to start the connection.
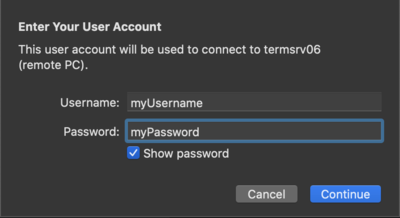
- You will then be prompted for the username and password used to log into the remote host. After typing in both the username and password, press the blue continue button.
- If you see a screen appear that looks like the one pictured below, press the blue continue button. You should then be connected to the remote host.
UNIX
xfreerdp
If you are trying to access a Windows host via RDP, you should use the xfreerdp client from the command line. This should be preinstalled, so there is no configuration that needs to happen.
To connect via RDP to a remote host with xfreerdp, type the following command, replacing values as appropriate:
xfreerdp -d UMIACS -u <USERNAME> --plugin cliprdr -g <GEOMETRY> <HOSTNAME>
Similar to rdesktop, here is an explanation of the values above:
- <GEOMETRY>: Percent of remote host's screen to mirror on the client
- <USERNAME>: Your UMIACS username (Do not include domain name)
- <HOSTNAME>: Fully Qualified Domain Name (FDQN) of the desired remote host
As with any of these RDP solutions, closing xfreerdp (using the top bar or using CTRL+C) without logging out could cause considerable problems for other users of the workstation. If you are using a shared workstation, please be sure to logout after you are finished with the remote machine using the Start menu.
Redirecting Resources on Windows
- Resource redirection must be set up before connection is established.
Audio Redirection
- This allows the remote desktop to access the audio capture and playback devices on the user's desktop.
- Click the "Show Options" drop down menu
- Navigate to the "Local Resources" tab
- Click the "Settings" button in the Remote audio box
- Select preferred audio preferences
- Select "OK
- Select "Connect"
Other Resource Redirection
- This allows the remote desktop to access the drives, printers, and video capture devices on the user's desktop.
- Click the "Show Options" drop down menu
- Navigate to the "Local Resources" tab
- Click the "More" button in the Local devices and resources box
- Click the checkbox next to the resources you would like to redirect
- Select "OK"
- Select "Connect"
Redirecting Resources on Mac
- If you have already created the PC connection, right click over the PC connection you wish to add resource redirection to, then select 'Edit'.
Folder/Drive Redirection
- This allows the remote machine to access specified folders on your local machine.
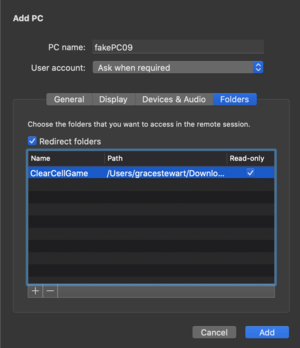
- Located halfway down the screen, select the 'Folders' tab.
- Check the box titled 'Redirect folders,' if not checked already
- Either select the folder(s) already listed you wish to access from the remote machine by checking the box next to the desired folder, or select the '+' button, then import and select the folder(s) you wish to access.
- Press the blue 'Add' button in the bottom right corner, or if you wish to direct other resources as well, see 'Other Resource Redirection' below.
Other Resource Redirection
- This will allow for camera, printer, and/or microphone access to be shared between machines.
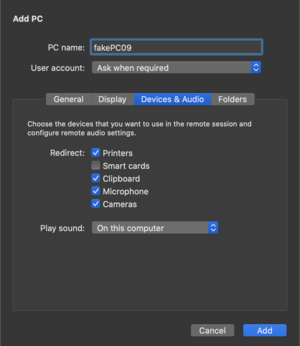
- Located halfway down the screen, select the 'Devices and Audio' tab.
- Ensure the boxes next to the services you would like to redirect are checked. For video, ensure that the 'Microphone' and 'Camera' boxes are checkmarked. For printer access, ensure that the 'Printers' box is checkmarked. Please be mindful to keep 'Clipboard' checkmarked, as that is what allows you to copy and paste between your local machine and the remote machine.
- Press the blue 'Add' button in the bottom right corner.
