AddingUMIACSCertificateAuthority: Difference between revisions
No edit summary |
|||
| Line 1: | Line 1: | ||
===Introduction=== | ===Introduction=== | ||
When you visit webpages encrypted with SSL, you may be presented with a warning about the site's security certificate not being trusted. These are normally important screens to pay attention to on the internet as a whole and UMIACS goes to great lengths to maintain a secure environment for our users. | When you visit webpages encrypted with SSL, you may be presented with a warning about the site's security certificate not being trusted. These are normally important screens to pay attention to on the internet as a whole and UMIACS goes to great lengths to maintain a secure environment for our users. There are rare times where we may use our own internal certificate authority (CA) instead of a third-party one with wider trust to issue a site's certificate, to keep costs down. If you want to add this CA's root certificate ahead of time, follow these steps to import it based on your preferred web browser. | ||
===Windows=== | ===Windows=== | ||
Latest revision as of 19:52, 24 April 2026
Introduction
When you visit webpages encrypted with SSL, you may be presented with a warning about the site's security certificate not being trusted. These are normally important screens to pay attention to on the internet as a whole and UMIACS goes to great lengths to maintain a secure environment for our users. There are rare times where we may use our own internal certificate authority (CA) instead of a third-party one with wider trust to issue a site's certificate, to keep costs down. If you want to add this CA's root certificate ahead of time, follow these steps to import it based on your preferred web browser.
Windows
For most Windows browsers (Chrome, Firefox, Edge and Internet Explorer), certificate authorities are handled by Windows itself. These are the steps required to accept the certificate:
- Click UMIACS Certificate Authority to download the file.
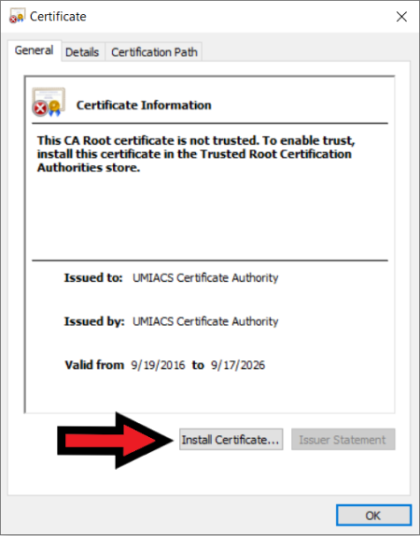
- Open the file and click "Install Certificate".
 ]
]
- In the dialog box opened, click "Next".
- Choose "Place all certificates in the following store".
- Choose "Browse", in the dialog box opened, Choose "Trusted Root Certification Authorities" and click "Ok".
 ]
]
- Click "Next" and then "Finish".
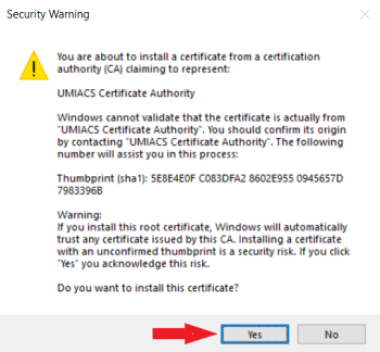
- If you get a Security Warning asking if you want to install this certificate, click "Yes".
 ]
]
- You should receive a success message similar to the following:
- You may need to restart your browser for the change to take effect.


Safari and Google Chrome (macOS)
For most macOS browsers (excluding Firefox), certificate authorities are handled by macOS itself. This process requires administrator access. If you do not have administrator access and you are using a UMIACS-supported Mac, please contact Staff. Otherwise, here are the steps required to accept the certificate:
- Click UMIACS Certificate Authority to download the file.
- Open Keychain Access (Located in the Others group in Launchpad)
- Go to the Systems > Certificates
- Open the UMIACS Certificate Authority file by double-clicking it (should be located in your downloads folder).
- Enter your administrator password or use your fingerprint on the dialog box that appears.

- Right-click the certificate that was just added and select the "Get Info" section.

- Select "Always Trust" option in the "When using this certificate" dropdown ("Trust" > "When using this certificate" > "Always Trust")
- Close the certificate and keychain access window.
- Enter the administrator credentials to add this certificate for all users of the system

- You may need to restart your browser for the change to take effect.
Other Browsers (Unix)
If you are using a browser other than Firefox in Unix, the process is more complicated than the above methods and may depend on your particular Unix distribution. If you need assistance with this please contact UMIACS Staff.