Google Drive/Backup and Sync: Difference between revisions
No edit summary |
No edit summary |
||
| Line 37: | Line 37: | ||
:[[File:B&s sync google drive circled WIN.png|600px]] | :[[File:B&s sync google drive circled WIN.png|600px]] | ||
* At this point, Backup and Sync has been installed. Any folders with green checkmarks next to them in File Explorer are backed up to Google Drive. | * At this point, Backup and Sync has been installed. Any folders with green checkmarks next to them in File Explorer are backed up to Google Drive. | ||
===Uninstalling Druva=== | |||
If you are migrating from Druva to Backup and Sync remember to uninstall Druva. This can be accomplished through searching for Control Panel in the windows search and then selecting "Uninstall a program" under the Programs section. Locate Druva, right click, select uninstall and run through the uninstall wizard. | |||
==MacOS Setup== | ==MacOS Setup== | ||
* Google Drive Backup and Sync can be downloaded here: https://www.google.com/drive/download/ | * Google Drive Backup and Sync can be downloaded here: https://www.google.com/drive/download/ | ||
| Line 59: | Line 63: | ||
:[[File:B&s sync my drive MAC.png|600px]] | :[[File:B&s sync my drive MAC.png|600px]] | ||
* At this point, Backup and Sync has been installed. Any folders with green checkmarks next to them in Finder are backed up to Google Drive. | * At this point, Backup and Sync has been installed. Any folders with green checkmarks next to them in Finder are backed up to Google Drive. | ||
===Uninstalling Druva=== | |||
If you are migrating from Druva to Backup and Sync remember to uninstall Druva. This can be accomplished through searching for the "Applications" folder in the spotlight search and then dragging the Druva icon to the trash in the bottom right corner of the desktop. | |||
Revision as of 20:19, 26 February 2021
Currently, Backup and Sync is the only option for continuous backup of local files on a machine. This means that after selecting designated locations on the machine, these locations and all of the files within them will be backed up to Google Drive.
- Setup instructions for Windows
- Setup instructions for MacOS
- Setup instructions with Rclone for Linux
Viewing Sync Status and Accessing Preferences
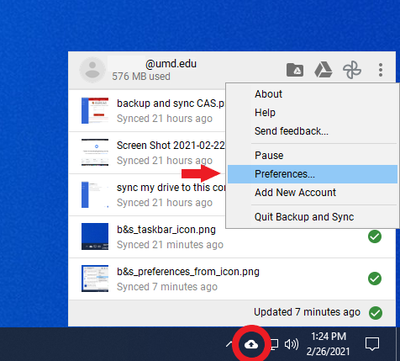
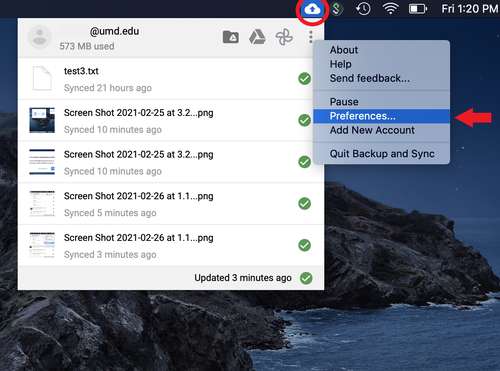
Once Backup and Sync has been installed, a cloud icon will show up in the taskbar. When this icon is selected, it will show the status of currently synced files and give shortcuts to your Google Drive, Google Photos, and the Backup and Sync preferences as highlighted in these Windows and Mac screenshots respectively:
Windows:
Mac:
Directory ID Password Reset
In the event of a Directory ID password reset (required every 180 days) this prompt will show up in the bottom right for Windows, or top right for Mac:
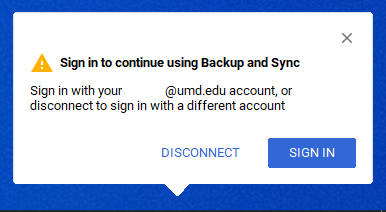
If this prompt comes up, simply sign in again using your UMD Gmail account and CAS and files will continue to back up as normal.
Windows Setup
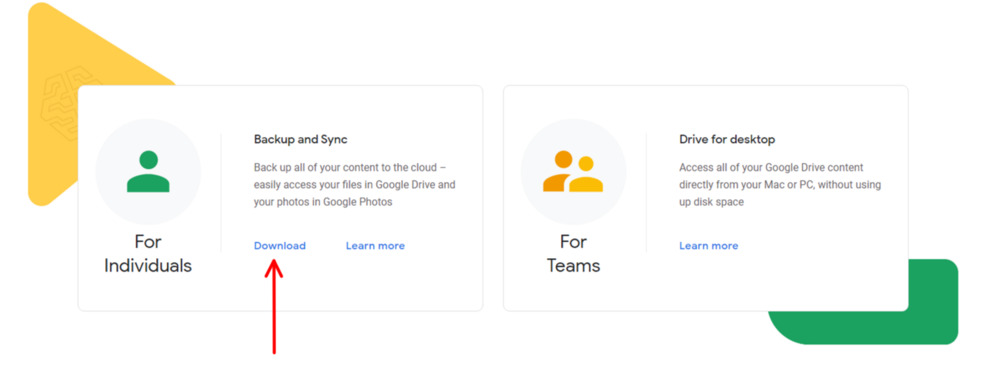
- Google Drive Backup and Sync can be downloaded here: https://www.google.com/drive/download/
Once at the webpage, navigate to the lower left-hand box labeled "Backup and Sync" and click the download button.
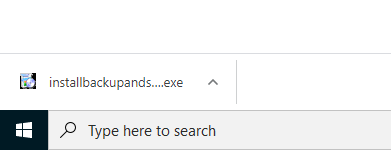
- Select the file "installbackupandsync.exe" in the lower left-hand corner of your browser and select "Yes" to install the software on your machine.
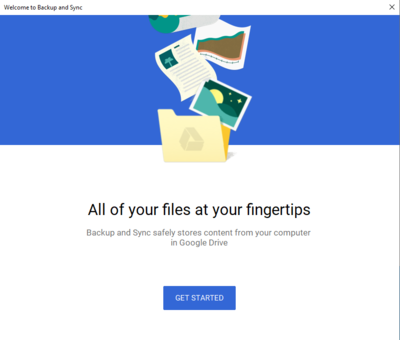
- After a few seconds a pop-up window should appear with a "Get Started" button. If the window does not appear, minimize your browser or any other windows on your desktop as it might be hiding beneath them.
- Select the "Get Started" button.
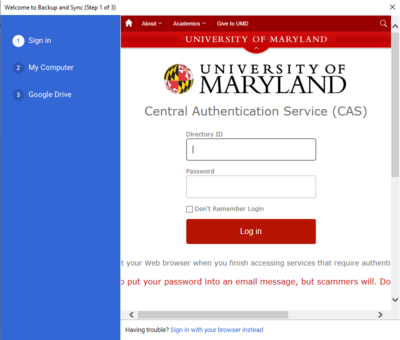
- The window will then prompt for sign in with a Google account. Sign into your UMD account using your $USERNAME@umd.edu email.
- You will then be brought to the UMD CAS Dual Factor Authentication Screen. Sign in with your normal credentials and dual factor authenticate.
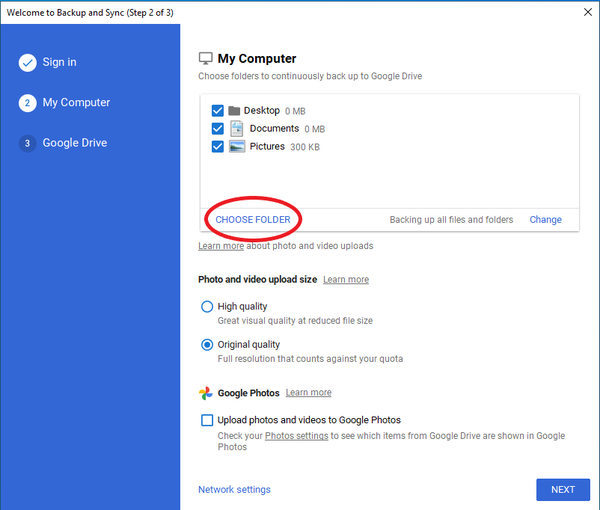
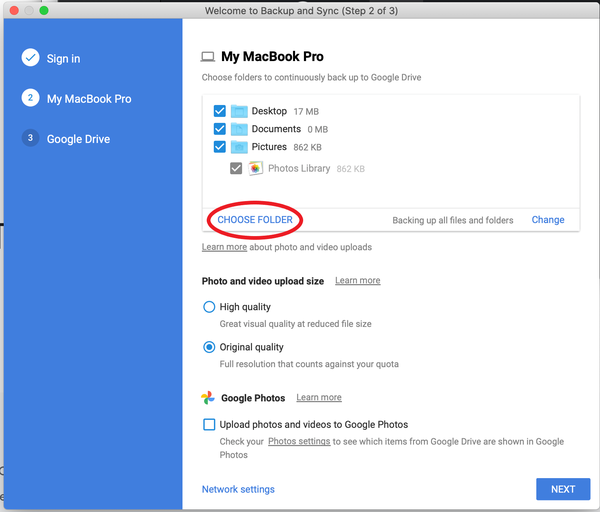
- Upon a successful sign in, you will be brought to the "My Computer" screen. At this point, select the folders and locations that you wish to have backed up to Google Drive. Any folders or locations which are not selected will not be recoverable via Google Drive.
- In order to add a folder to be backed up, select the "CHOOSE FOLDER" button.
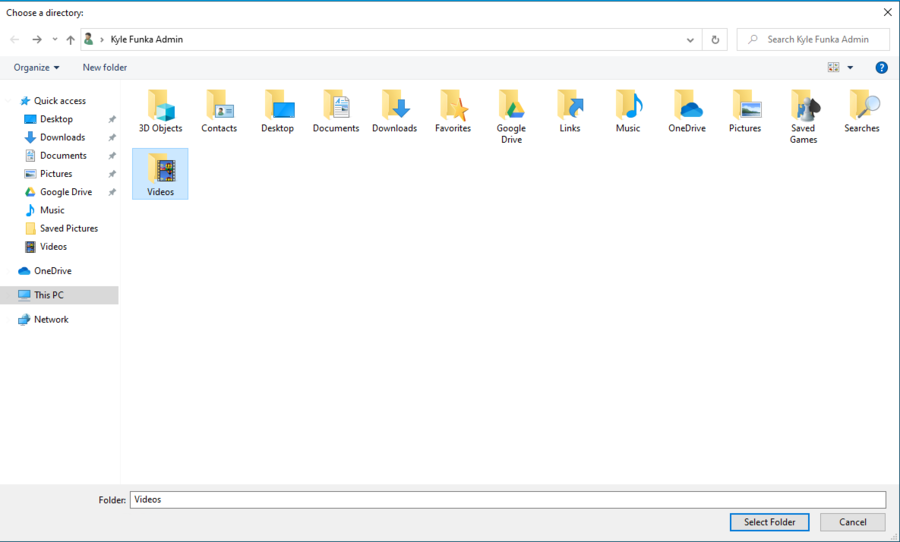
- This will bring you to your File Explorer where you can select a specific folder on the machine that you would like to be backed up. In this example the "Videos" folder was selected to be backed up.
:
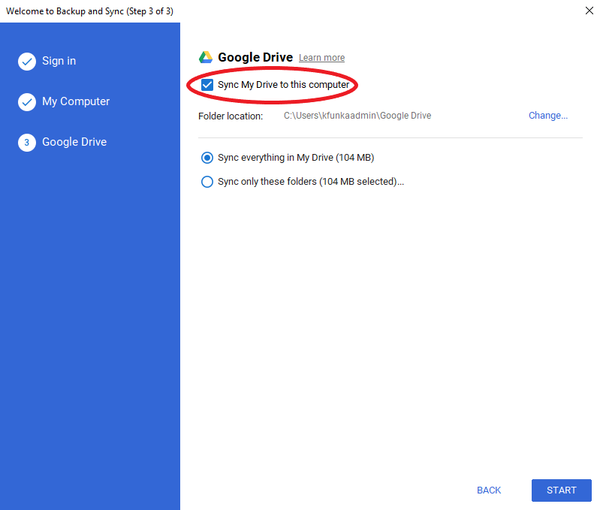
- After this there will be a prompt to "Sync My Drive to this computer". If this checkbox is selected, a file location will be created on the computer labeled "Google Drive" that will be synced with all of the files uploaded to your Google Drive from any device, not just the files selected in the previous step for backup.
:
- At this point, Backup and Sync has been installed. Any folders with green checkmarks next to them in File Explorer are backed up to Google Drive.
Uninstalling Druva
If you are migrating from Druva to Backup and Sync remember to uninstall Druva. This can be accomplished through searching for Control Panel in the windows search and then selecting "Uninstall a program" under the Programs section. Locate Druva, right click, select uninstall and run through the uninstall wizard.
MacOS Setup
- Google Drive Backup and Sync can be downloaded here: https://www.google.com/drive/download/
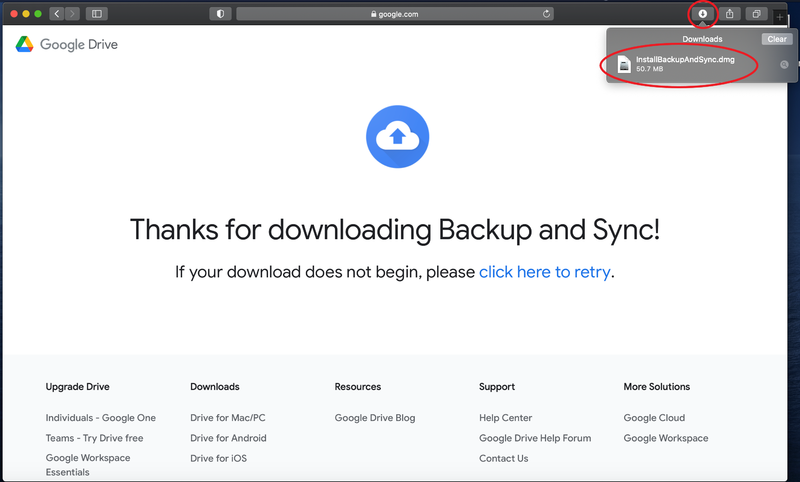
Once at the webpage, navigate to the lower left-hand box labeled "Backup and Sync" and click the download button. If the download does not work select the "click here to retry" hyperlink in the next window.
- Select the icon in the top right of the browser window with the downward arrow in the white circle. A file named "InstallBackupAndSync.dmg" should appear. Select this file.
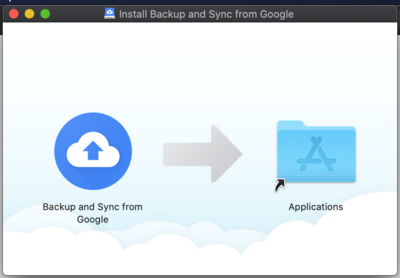
- Another window should pop up with the "Backup and Sync from Google" icon and an arrow pointing to the "Applications" folder. Drag and drop the "Backup and Sync from Google" icon into the "Applications" folder to begin the installation.
- If it does not open automatically, open the "Applications" folder, then double click the "Backup and Sync from Google" icon.
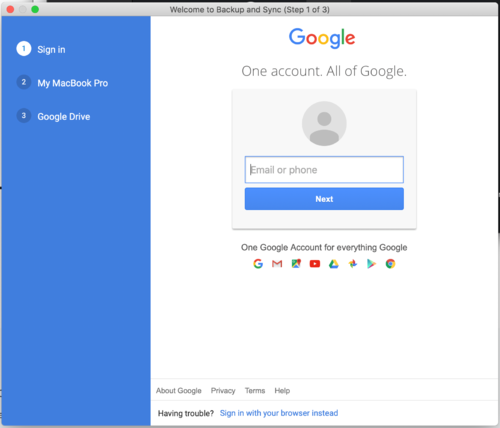
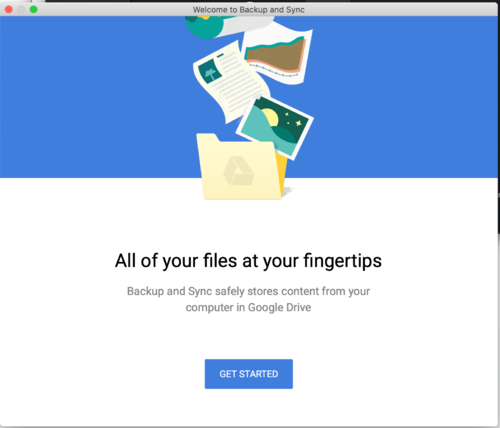
- Accept any permissions that the install requires and a window should pop up. Select the "GET STARTED" button.
:
- The window will then prompt for sign in with a Google account. Sign into your UMD account using your $USERNAME@umd.edu email.
- You will then be brought to the UMD CAS Dual Factor Authentication Screen. Sign in with your normal credentials and dual factor authenticate.
- Upon a successful sign in, you will be able to select the folders and locations that you wish to have backed up to Google Drive. Any folders or locations which are not selected will not be recoverable via Google Drive.
- In order to add a folder to be backed up, select the "CHOOSE FOLDER" button.
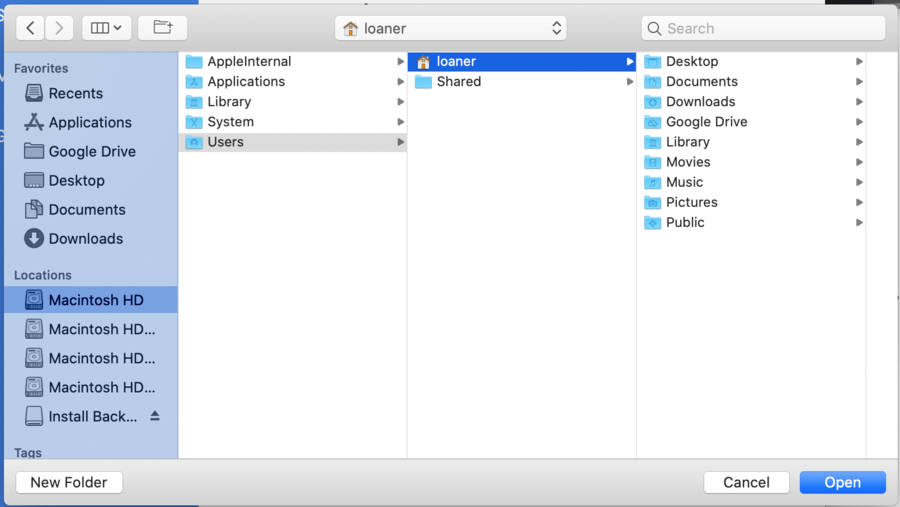
- This will bring you to your Finder where you can select a specific folder on the machine that you would like to be backed up. Select the folder and then click the "Open" button to add it to the locations that will be backed up.
:
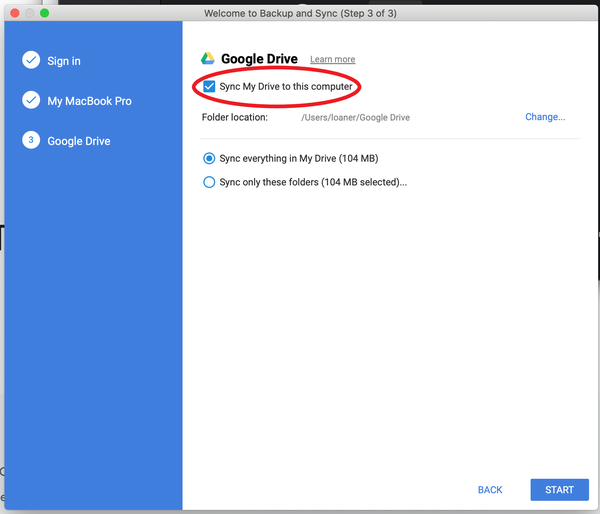
- After this there will be a prompt to "Sync My Drive to this computer". If this checkbox is selected, a file location will be created on the computer labeled "Google Drive" that will be synced with all of the files uploaded to your Google Drive from any device, not just the files selected in the previous step for backup.
:
- At this point, Backup and Sync has been installed. Any folders with green checkmarks next to them in Finder are backed up to Google Drive.
Uninstalling Druva
If you are migrating from Druva to Backup and Sync remember to uninstall Druva. This can be accomplished through searching for the "Applications" folder in the spotlight search and then dragging the Druva icon to the trash in the bottom right corner of the desktop.
