Network/VPN/Mobile: Difference between revisions
Jump to navigation
Jump to search
m (Mbaney moved page Network/VPN/IOS to Network/VPN/Mobile: Instructions also work for Android) |
No edit summary |
||
| (One intermediate revision by the same user not shown) | |||
| Line 10: | Line 10: | ||
*After clicking on 'Submit', a page titled 'Add a Connection' will pop up. You will then be prompted for some basic information. You will need to provide the following information and then click 'Save' or 'Add' (depending on client version). | *After clicking on 'Submit', a page titled 'Add a Connection' will pop up. You will then be prompted for some basic information. You will need to provide the following information and then click 'Save' or 'Add' (depending on client version). | ||
::*'''Connection Name:''' UMIACS VPN | ::*'''Connection Name:''' UMIACS VPN | ||
::*'''Username:''' your | ::*'''Username:''' <your UMIACS username> | ||
::[[Image:Ios-pulse-2.png|thumb|left|300px]]<br style="clear:both"/> | ::[[Image:Ios-pulse-2.png|thumb|left|300px]]<br style="clear:both"/> | ||
== Using the Client == | == Using the Client == | ||
#After the client has been configured, you can simply hit the 'Connect' button to start the VPN Connection. | |||
#:[[Image:Ios-pulse-3.png|thumb|left|300px]]<br style="clear:both"/> | |||
#Enter your UMIACS password, and hit 'Sign in'. | |||
#:[[Image:Ios-pulse-4.png|thumb|left|300px]]<br style="clear:both"/> | |||
#Choose your preferred method of multi-factor authentication. | |||
#:[[Image:Vpn_mobile_mfa.jpg|thumb|left|300px]]<br style="clear:both"/> | |||
#You are now connected. You connection status is verified by the VPN symbol in the top status bar. | |||
#:[[Image:Ios-pulse-5.png|thumb|left|300px]]<br style="clear:both"/> | |||
#To stop the VPN tunnel, click 'Disconnect'. | |||
Latest revision as of 18:04, 27 July 2023
Download and Install the Pulse Secure Client
Pulse Secure for iOS and Android enables secure connectivity over SSL VPN to internal UMIACS resources. The app can be downloaded for free from the App Store or Google Play:
- iOS (App Store): https://apps.apple.com/us/app/pulse-secure/id945832041
- Android (Google Play): https://play.google.com/store/apps/details?id=net.pulsesecure.pulsesecure&hl=en_US
Configuring the Client
- When the client is first launched, it will prompt you to accept its license agreement. Click 'Accept' to continue.
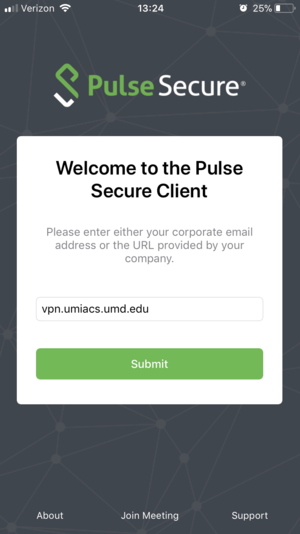
- You may need to enter a Corporate E-mail address or URL before continuing. Enter vpn.umiacs.umd.edu.
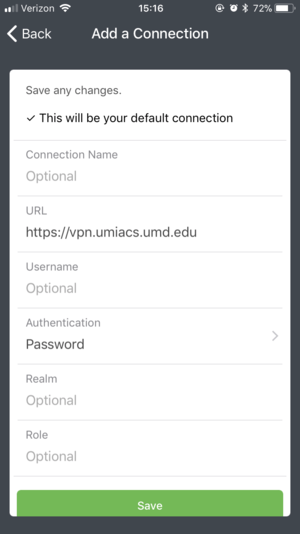
- After clicking on 'Submit', a page titled 'Add a Connection' will pop up. You will then be prompted for some basic information. You will need to provide the following information and then click 'Save' or 'Add' (depending on client version).
- Connection Name: UMIACS VPN
- Username: <your UMIACS username>
Using the Client
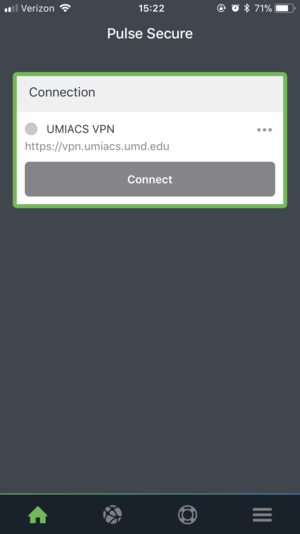
- After the client has been configured, you can simply hit the 'Connect' button to start the VPN Connection.
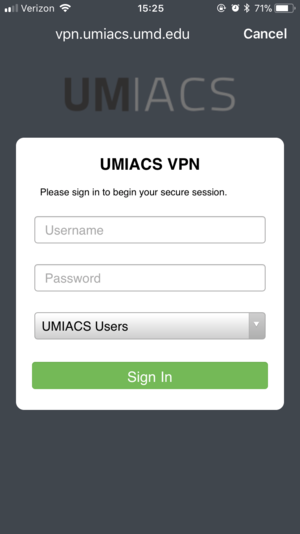
- Enter your UMIACS password, and hit 'Sign in'.
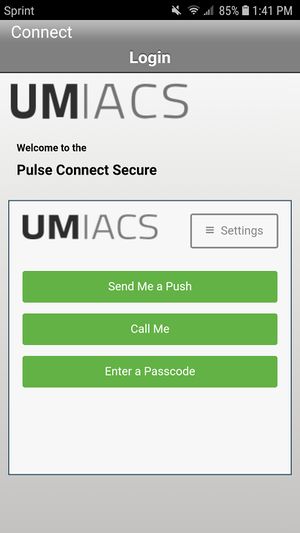
- Choose your preferred method of multi-factor authentication.
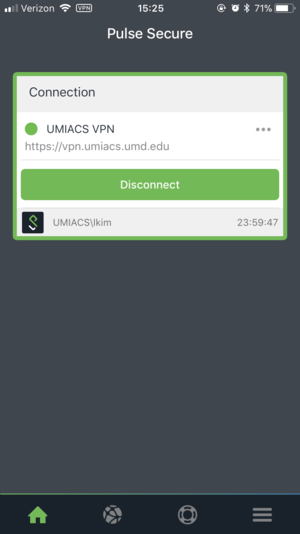
- You are now connected. You connection status is verified by the VPN symbol in the top status bar.
- To stop the VPN tunnel, click 'Disconnect'.
