OBJ/WebHosting: Difference between revisions
Jump to navigation
Jump to search
No edit summary |
|||
| Line 6: | Line 6: | ||
# Upload your index.html file and error.html file (optional) on the bucket that you just created. | # Upload your index.html file and error.html file (optional) on the bucket that you just created. | ||
# Once the bucket is created, click on '''Bucket Settings''' | # Once the bucket is created, click on '''Bucket Settings''' | ||
# On the settings page, click on the blue '''Make Public''' button. | # On the settings page, click on the blue '''Make Public''' button. <br>[[File: bucket_settings.jpg|600px]] | ||
# Under Website Hosting, enter the name of your index.html (and error.html) file and hit Submit. | # Under Website Hosting, enter the name of your index.html (and optionally error.html) file and hit Submit. | ||
'''Second Method (Using the CLI):''' | '''Second Method (Using the CLI):''' | ||
Revision as of 15:19, 23 July 2021
Hosting a Web
Hosting a website in OBJ is quite easy and can be done in a few simple steps. There are two different ways you can set up your Obj bucket to host a static website.
First Method (Using the Web Interface):
- Create a bucket. Make sure to choose a bucket name carefully since this will be part of the web URL.
- Upload your index.html file and error.html file (optional) on the bucket that you just created.
- Once the bucket is created, click on Bucket Settings
- On the settings page, click on the blue Make Public button.
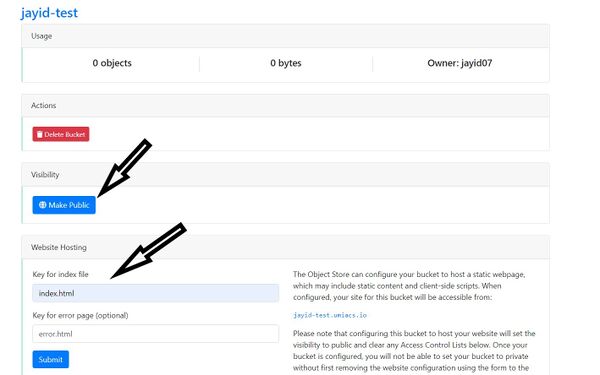
- Under Website Hosting, enter the name of your index.html (and optionally error.html) file and hit Submit.

Second Method (Using the CLI):