Adobe Illustrator for Beginners
Overview
On this page we will go over the basic skills needed to start a small project in Adobe Illustrator. This page will be useful for beginners who have never used Adobe Illustrator before. It will include very basic information and demonstrations for the starting tools that you will need and help explain the layout of Adobe. Once you get accustomed to this page (or already are) and would like more information, you can go to Adobe Illustrator for more help on the rest of Adobe.
Getting Started
Signing In
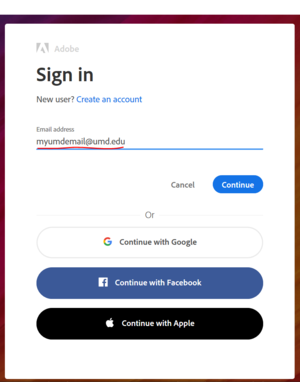
Adobe Illustrator is a paid program that requires a valid log in to be able to use. Fortunately, UMD provides all students with access to many Adobe products. If you just enter your UMD email (ending in @umd.edu not @terpmail.umd.edu) then you will be redirected to the Central Authentication Service (CAS) screen like if you were logging onto Testudo. Just enter your credentials and Adobe will load up.
If you are using Adobe on your personal computer you will only need to login once before it remembers you but if you are using the computers at Sandbox, you will need to log in every time to computer logs off since the computer is reset upon login. Logging in to Adobe Illustrator here will also give you access to other Adobe products you have on your computer so you don't need to login multiple times.
Creating the Canvas
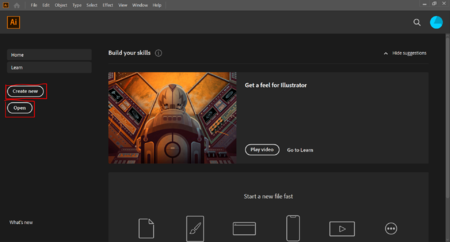
When you first open Adobe Illustrator, it might seem confusing about where to start, but for starting out all you need to know about the main screen is the "Create New", and "Open" buttons. The "Create New" button is for creating a new canvas with specified dimensions. "Open" can be used to open previously saved Adobe files by browsing your files for the saved file and opening it.
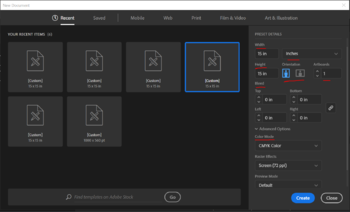
Then you will be greeted by a screen asking for a choice of dimensions and presets to start your project. On the left, you will see squares representing the settings for projects you have used recently. On the right, you can see the details of that preset like height/width, units of measurement, orientation, etc. The four texts, top/bottom/left/right are the bleed settings that allow you to have a margin of error by printing a little more passed the work space if you accidentally go over the edge. This is mostly useful for doing printing of things done in Adobe. In the advanced options you can change the Color Mode. If you are using Adobe for the laser cutters, it is recommended that you change the mode to RGB because in order to make 255 BLUE or 255 RED for vector or cutting, you need to be in RGB mode. The artboard setting allows you to create new artboards (will later explain what artboards are in the next section).
If you find yourself constantly using the same preset, you should try renaming the preset so you always know which you want and make it easier to find.


