Google Drive/Migrating from Backup and Sync to Drive for Desktop
Jump to navigation
Jump to search
Google has unified their previous two existing Drive sync clients (Backup and Sync and Drive File Stream) into a single sync client called Drive for desktop. If you were previously using Backup and Sync, please follow the steps below to migrate from Backup and Sync to Drive for desktop.
Windows Setup
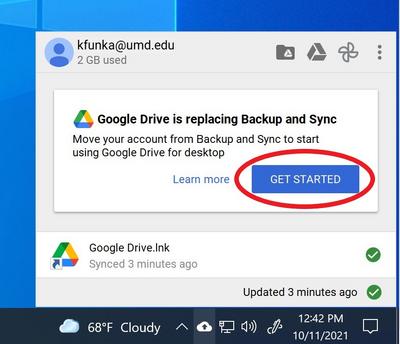
- Click on the Backup and Sync cloud icon in the lower righthand corner of your desktop. If the icon is not immediately visible, select the up arrow to show more icons.
- Select the "GET STARTED" button.
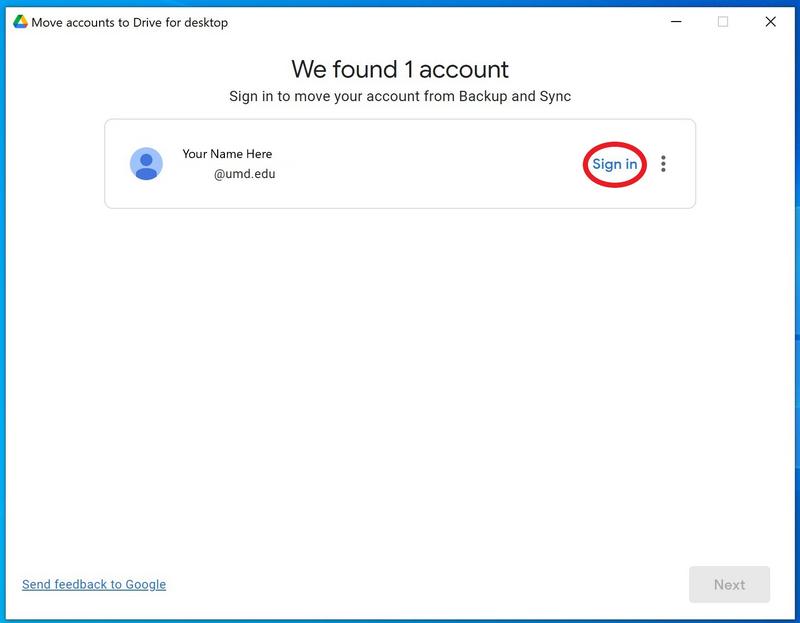
- Select the "Sign in" button. This will bring up your associated Google Accounts. Make sure to select the account with <DIRECTORYID>@umd.edu.
- After you have signed in, Drive for Desktop will check your folders to make sure all of your files are up to date and ask you to review your settings and inform you of the location of your Google Drive in your local filesystem.
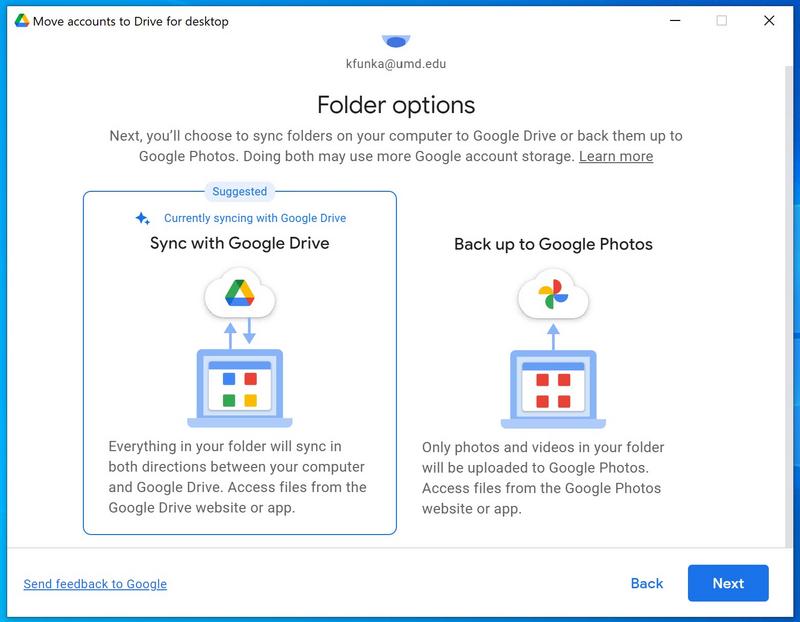
- Drive for Desktop will then ask you if you would like to store your photos and videos from your computer on your Google Drive or your Google Photos. NOTE: If you select the Google Photos option, you will need to sign into Google Photos using your <DIRECTORYID>@umd.edu Google account to access them. They will not sync into your personal Google account.
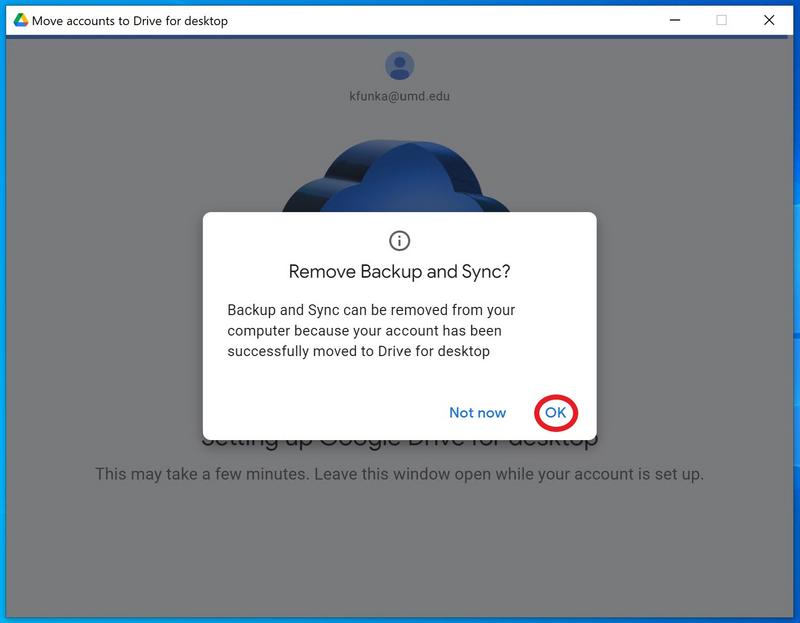
- You will then be prompted to remove Backup and Sync from your system, go ahead and select the "OK" option as this software will eventually become depreciated.
- Congratulations! Drive for Desktop is now installed on your system and you can start to save files to the Google Drive directory in your filesystem. Any folders previously backed up by Backup and Sync will now be backed up by Drive for Desktop as will as any files saved to the Google Drive directory in your filesystem.


