DigitalLoanerForm: Difference between revisions
Jump to navigation
Jump to search
| Line 23: | Line 23: | ||
#: [[File:Fillable6.png|alt=Screenshot of Adobe Acrobat showing expected notice in step 8]] | #: [[File:Fillable6.png|alt=Screenshot of Adobe Acrobat showing expected notice in step 8]] | ||
# Click File in the top left and Save As... | # Click File in the top left and Save As... | ||
#: [[File:Fillable7.png]] | #: [[File:Fillable7.png|alt=Screenshot of Adobe Acrobat menu highlighting indicated fields in step 9]]] | ||
# Click Choose a Different Folder... on the Save As PDF menu. | # Click Choose a Different Folder... on the Save As PDF menu. | ||
#: [[File:Fillable8.png]] | #: [[File:Fillable8.png|alt=Screenshot of Adobe Acrobat menu highlighting indicated fields in step 10]]] | ||
# Choose an appropriate location to save the file, rename the file to include the word 'signed', and save the file. | # Choose an appropriate location to save the file, rename the file to include the word 'signed', and save the file. | ||
#: [[File:Fillable9.png]] | #: [[File:Fillable9.png|alt=Screenshot of Adobe Acrobat menu highlighting indicated fields in step 11]] | ||
# Attach the signed form to the originating request that prompted staff to direct you to this page. | # Attach the signed form to the originating request that prompted staff to direct you to this page. | ||
Latest revision as of 20:39, 26 March 2026
Overview
To digitally complete a loaner form provided by UMIACS Staff, follow these steps.
Prerequisites
- Adobe Acrobat DC (available from Terpware free to all students, staff, and faculty) or Adobe Acrobat Reader DC (free to everyone)
Procedure
- Download the form that has been provided by UMIACS staff. Open it in either Adobe Acrobat DC or Adobe Acrobat Reader DC.
- If need be, here is a blank form.
- Click on Tools on the top menu, find Fill & Sign under Forms & Signatures, and click Add and/or Open.
- Click Fill and sign under the area that says You with the Fill & Sign menu.
- Take note of the following notice in the top right of the application and click OK.
- Fill out fields that have been specified as appropriate. At minimum, this should be at least the Description of Equipment field for all items, and for any equipment that has a University Inventory Number (red tag) and/or serial number, these fields for that equipment as well. If you have been in contact with UMIACS Staff previously, they may have pre-filled some of these fields for you. Leave the signature field blank.
- Click on Sign on the Fill & Sign top menu, and then Add Signature (if you have previously generated a signature, that existing signature will appear instead and you can choose it and skip the next step).
- Click Apply at the bottom to use the auto-generated signature from Adobe. You can choose to either draw or upload an image instead if you would like, but the auto-generated one is sufficient.
- Place the signature in the signature field. Note that you will not be able to edit the form further after you save the PDF at this point.
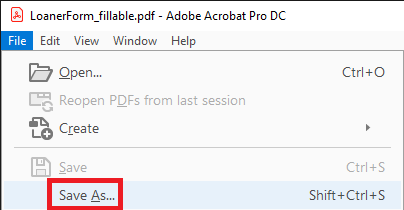
- Click File in the top left and Save As...
 ]
]
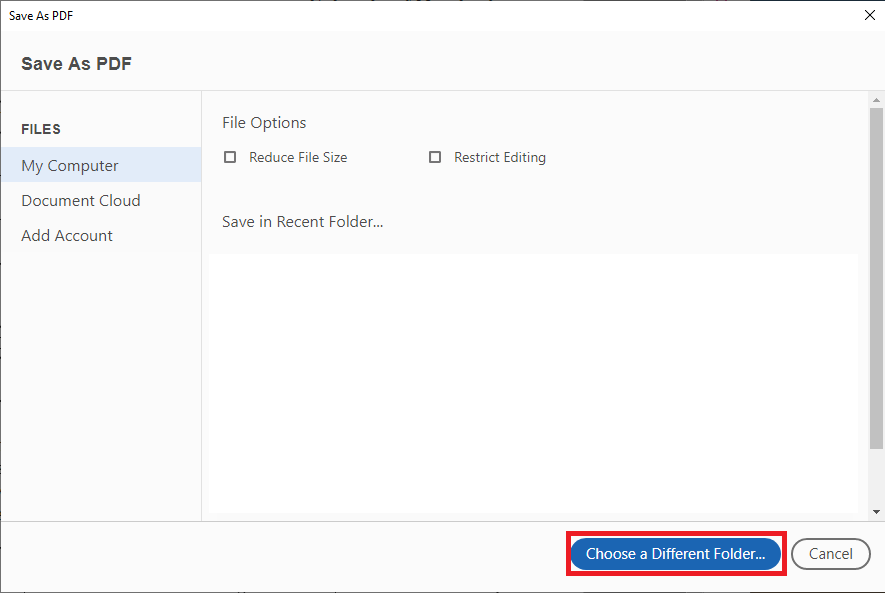
- Click Choose a Different Folder... on the Save As PDF menu.
 ]
]
- Choose an appropriate location to save the file, rename the file to include the word 'signed', and save the file.
- Attach the signed form to the originating request that prompted staff to direct you to this page.


