UbuntuPrinting: Difference between revisions
Jump to navigation
Jump to search
No edit summary |
No edit summary |
||
| Line 25: | Line 25: | ||
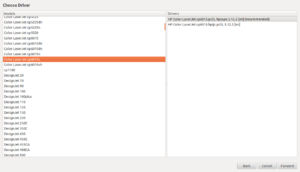
#:[[Image:UbuntuPrint06.png|thumb|none|300px|[9] Select the model of the printer as you noted in step 5]] | #:[[Image:UbuntuPrint06.png|thumb|none|300px|[9] Select the model of the printer as you noted in step 5]] | ||
#Leave the "try to copy the option settings over from the old PPD' option selected and click forward. | #Leave the "try to copy the option settings over from the old PPD' option selected and click forward. | ||
#Select | #Select any additional features available for the printer (i.e. duplexing), and then click forward. | ||
#Verify this process by printing a test page. You should get the Default ubuntu test page. If you just get a page with a string of text then printer is not properly configured, and you should verify the settings. | #Verify this process by printing a test page. You should get the Default ubuntu test page. If you just get a page with a string of text then printer is not properly configured, and you should verify the settings. | ||
Revision as of 15:20, 9 August 2013
Overview
- Printing from your personal Ubuntu laptop or desktop is supported. If you are sitting at a supported UMIACS Ubuntu LTS desktop then please see our common UNIX/Linux printing documentation for CUPS. This documentation assumes the current Ubuntu LTS 12.04.xx release and while older or newer versions of Ubuntu may work, we have not tested them.
Printer Accessibility
- In order to print you will need to be on the UMIACS internal network, or connected the the UMIACS VPN. Details on getting connected to the VPN are available here: : How to connect to the Ubuntu VPN
Connecting to a printer
In order for printing to function properly, you must complete ALL of the following steps:
- Open the 'Printing' dialog box and click 'Add'
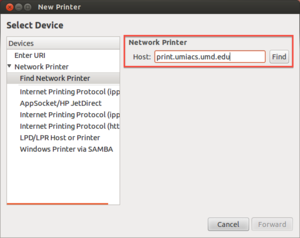
- Expand the 'Network Printer' dropdown list, and select 'Find Network Printer'
- In the host field type "print.umiacs.umd.edu" and click find.
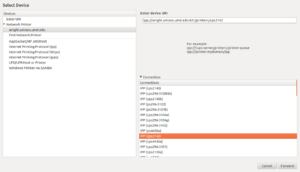
- Select the print queue you wish to print to, click forward. If you are unsure which queue to use, see the selecting a print queue page.
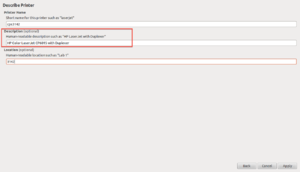
- Name the printer. Take note of the model name listed in the Description. This will be used later! Then click 'Apply'
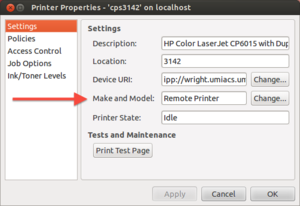
- In the printing dialog box, right click the newly added printer and select properties.
- In the 'Make and Model' line, click 'change'
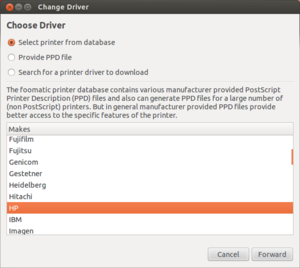
- Ubuntu will now load a list of printers models (This will take a few moments). From that list, select the brand of the printer you are connecting to as noted in step 5.
- Select the specific model of the printer as noted in step 5. Then click forward.
- Leave the "try to copy the option settings over from the old PPD' option selected and click forward.
- Select any additional features available for the printer (i.e. duplexing), and then click forward.
- Verify this process by printing a test page. You should get the Default ubuntu test page. If you just get a page with a string of text then printer is not properly configured, and you should verify the settings.
How to select a print queue
Troubleshooting
- Before contacting staff for support, please take note of the following items:
- Are you in the internal network, or connected to the VPN?
- Can you ping 'print.umiacs.umd.edu'?
- Have you made any recent changes to your printing options?
