Editing the HCIL Website: Difference between revisions
No edit summary |
No edit summary |
||
| Line 62: | Line 62: | ||
'''Editing Page Appearance''' | '''Editing Page Appearance''' | ||
The appearance tab on the left dashboard allows you to make changes the visual appearance of the website. You can change themes, customize website visual design, change widgets. In editor, you can see the website code | |||
# Themes - change the website theme | |||
# Customize - customize website theme colors/header/background image/homepage settings | |||
# Widgets - customize widgets for different parts of the website | |||
# Editor - See the style sheet and pHp files. You cannot directly edit the code in the editor, even though several links are hardcoded. You can make link edits in cPanel or by uploading an updated file via FTP. | |||
[updates coming soon] | [updates coming soon] | ||
Revision as of 05:11, 3 August 2018
Logging onto the HCIL website: https://hcil.umd.edu/wp-login.php To request access, email hcil-info@cs.umd.edu
Posts
Featured items on the HCIL are organized by posts (e.g. Featured News, Featured Alumni).
Edit Posts by clicking on "Posts" in the dashboard on the left side of the screen. While editing, you may run into issues with weird spacing or hidden formatting. Switch to the HTML or "text" view and delete or edit HTML as necessary.
- Create a new post by clicking "add new" button.
- Add images or video by clicking "Add media." You can either upload your own media, or add media from the media library.
- Preview any changes you make before publishing. The last thing you want to do is delete some else's work
- Organize posts into featured items by checking the appropriate category. If multiple posts are checked in a category (e.g. featured publication), the links to the different posts will rotate between the images. If you only want a featured item to remain static, uncheck the any other posts featured in that category.
- Tags - you can tag your posts with keywords. However, this feature is not used often.
- Featured images allow you to change the image link to the post. You can either upload your own media, or add media from the media library
Adding Media
Click on the media tab on the left dashboard, click "Add new" and select the file you want. Your file will appear as https://hcil.umd.edu/wp-content/uploads/Year/Month/name.extension, e.g. https://hcil.umd.edu/wp-content/uploads/2018/07/test.png
- Make sure to name the file appropriately before uploading - you will not be able to edit the file's URL after uploading*
- Edit images properties: In the image library, click on the image, and click on "edit image" below the image. In the attachment details page, you will be able to rotate images, scale and crop the image.
- Delete images: In the image library, click on the image, and click "Delete Permanently"
Pages
Most content on the HCIL is organized by pages. Similar to posts, you can add new pages, add media to pages, organize, tag and add a category and featured images. For pages, featured images appear at the top of the page.
Editing Page Menus
To edit the HCIL menu (at the top right), click on "Appearance" in the left dashboard. Drag menu items around to change their position and hierarchy.
Adding/Editing/Deleting People
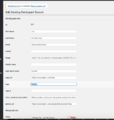
People (e.g. faculty, current students, etc.) are organized using the participant database in the left dashboard. To edit people in different categories, click on the participate database tab, and click on the pen icon to the left of each name. In the "Edit Existing Participant Record" page:
- Change an image by changing the image URL. Most people images are saved in the media library - you will have to manually check the media library URL. You can also change or add a new image under "Personal information" at the bottom of the page.
- Change the category people fall under using "type" and ""Type_2." Faculty and staff are listed using the "Faculty" type, and "Students" are listed using the "Student" type. If you don't know what category people are listed by, look up another person from that category to see what type they fall into.
- To remove people from different categories, simply remove delete their "type" category. This will remove their profile from the website, but leave their profile intact for any future changes.
To add new people, click on the participant database tab. Several sub-tabs will appear below it.
- The "add participant" sub-tab will create a new record that you can fill in from scratch.
- You can add several people using the "import CSV file" tab, this will allow you to upload several people at once. When uploading the CSV, make sure your columns match those specified in the tab.
Editing Page Appearance
The appearance tab on the left dashboard allows you to make changes the visual appearance of the website. You can change themes, customize website visual design, change widgets. In editor, you can see the website code
- Themes - change the website theme
- Customize - customize website theme colors/header/background image/homepage settings
- Widgets - customize widgets for different parts of the website
- Editor - See the style sheet and pHp files. You cannot directly edit the code in the editor, even though several links are hardcoded. You can make link edits in cPanel or by uploading an updated file via FTP.
[updates coming soon]
Database management in cPANEL [updates coming soon] Updating faculty or students: make changes in the database in Cpanel. If adding someone: email them the url of New To The HCIL. If removing someone: add them to the alumni page (edited normally in wordpress).
Symposium Page
[updates coming soon]
The symposium webpage is not easy to edit... see email from Anne Thursday, December 7, 2017 for discussion


