Custom Catan Board
Build Overview
This page documents the creation of a 3D printed Catan board and custom box for storing the pieces. This project involves 3D printing the many board game pieces, woodworking to create the box, wood painting, and figuring painting. This project is based on an online Instructables tutorial.
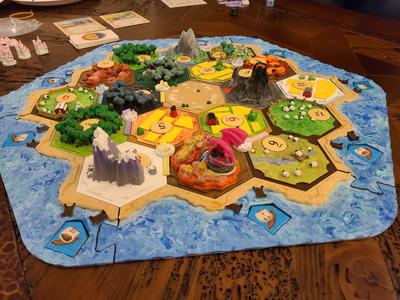
The board completed and being played.

The box storing all the pieces.


The build can be broken down into a few different steps:
- 3D printing the pieces
- Laser cutting the box
- Gluing the box together
- Painting the box (ensure this is done AFTER gluing, otherwise, you might chip the paint, or the glue won't be as strong)
- Lining the box (this is not necessary, but might help save the pieces from breaking)
- Decorating the box
- Painting the game pieces
Printing the Pieces
The 122 different pieces you will need are:
- 1x desert tile
- 1x each of the hill/brick tiles (3 total)
- 1x each of the mountain/ore tiles (3 total)
- 1x each of the pasture/wool titles (4 total)
- 1x each of the forest/lumber tiles (4 total)
- 1x each of the field/grain resource (4 total)
- 6x water borders
- 16x citys (4 for each player)
- 20x settlements (5 for each player)
- 60x roads (15 for each player)
- 1x dragon
Most of these pieces can be found on the Instructables webpage, but the water border pieces can be found here.
It will be a long process of printing all the pieces as the best option is to print most of them individually as they are prone to error or slight printing issues. I have found that it is possible to print many of the settlements, cities, and roads together using the sequential print option. This can be found in the Custom print settings page, if you search "print sequence", you can change the option to "one at a time". This makes the printer completely finish one piece before starting on the next. This will stop mistakes from happening with the nozzle quickly moving between the different pieces. However, this will limit how many you can print at once.
Luckily, the infill only really needs to be at 5% since they do not need to be insanely sturdy. The layer height can be .2mm for the hex tiles and water pieces and .1mm for the dragon, cities, settlements, and roads. The only piece that will need support is the dragon, however you will likely want to use dissolvable support PVA as ripping PLA support off can damage the pieces. In total, the printing time will be somewhere around 75-100 hours, depending on the running variables.
The color of the pieces does not matter much if you are painting over the pieces. The best options are either to try and match the printing material color with the desired painted color, or use a neutral color like a light grey or white that paints over easily.
I'd recommend at least planning the box, if not working on it while the pieces are printing as this will be a lot of waiting.
Check the pieces as they are being printed to see if they need to be reprinted. Some pieces (especially the sheep with trees) might have parts that fall off, like the tree tops. These flaws don't require a reprint as the pieces still look good, but that is up to you.
For each hex tile, you will need to use wire cutters to snip off the circles around the corners that are printed to reduce warping. You will also likely need to sand down all the bottom edges of the hex tiles for the pieces to fit snuggly in the water borders.
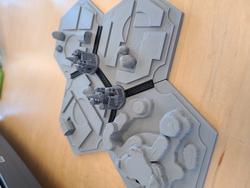
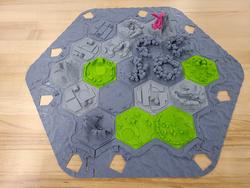
Test the pieces together as they come out to make sure they look cohesive.
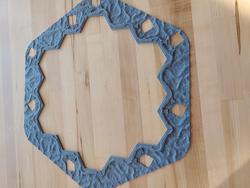
The border pieces should tightly fit together to form a hexagon.
After sanding, the pieces should fit tight together.


Planning the Box
To create the box, I used a laser cutter to cut 3/16 inch thick wood into pieces to be glued together.
I planned my box using an online resource, however, you can use any resource to create your box (help can be found on this wiki page. There are many different designs you can do and that depends on what type of box you want. Some options are sliding tops (top slides off the side of the box), a box with hinges (like a chest), or a top with latches. I chose the latch top as my box was very wide and hinges likely wouldn't have been strong enough with the thickness (3/16 inch) of the wood I chose.
There are many different options you can choose for your box. For mine, I chose to have three sections, one for the player pieces, one for the hex tiles, and one for the rest of the game pieces and resources. To make the dividers, I measured the inside of the box and created a rectangle in Adobe Illustrator that is slightly shorter than the height of the inside of the box.
Once you have created your box design, laser cutting is simple using your desired material by following the laser cutter training.
Assembling the Box
Assembling the box before painting is crucial to ensure that no paint is messed up when gluing individually painted parts together. If you used the box creator programs talked about above, this step should be very simple. All you should need to do is apply wood glue (or your other desired glue) to the joints and clamp them together to dry.
If you are making two box bottoms and attaching them with hinges like I did, I recommend gluing all 4 sides to the bottom/top at once, to ensure they fit together before the glue hardens.
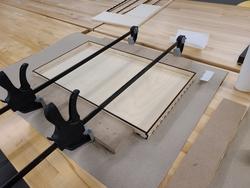
The box top being glued.
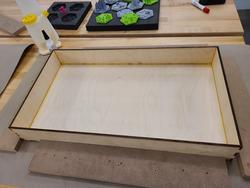
The box bottom being glued.

